In experimenting with materials
other than what would be considered "traditional", I have found
that white portland cement works best for my style and subject matter. I have
worked with this material for over 10 years now in sculpture, tiles, bases
and counter tops. In this time I have found that some things work better than
others. Here is an example of what works best for my sculptures.
The cement that I use through this process is white portland cement. The cement
is mixed with silica sand in a ratio of about 1 part sand to 2 parts cement,
and a small amount of micro fibers Fibermesh® 150, ¾ " long polypropylene
multifilament fibers, that I found at a ready mix cement company, a 1 lb bag
will last a long time. Enough latex 1 : water 4 is added to this mixture to
achieve the consistency of clay. The use of a latex additive and fibers allows
for better adhesion to dried cement, helps to prevent cracking, and offsets
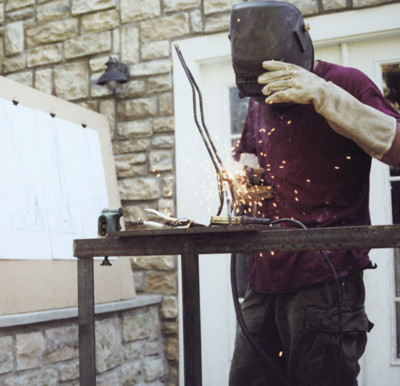
the lack of aggregate or sand. I use a metal armature when starting my sculptures,
similar to what would be used in clay or plaster. I weld steel rod together
forming a skeleton to support the cement. (see photo 1) The foundation
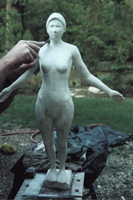
layers of cement are mixed with coarse steel wool that have been torn into
strips, soaked in cement and then ready to wrap around the armature (see
photo 2). I use this process to build the basic foundation of the figure.
After this step the figure is then wrapped loosely in plastic to retain moisture
and not dry out to quickly and crack. After 6 - 12 hours, the first layer
can be carved with a knife and rasped to further define the form. Another
layer of cement is then added to finalize the figure. In this step I have
the option of switching to a finer grade of steel wool or omitting it completely.
This layer, when finished, again needs to be wrapped and allowed to set-up,
or can be allowed to dry out somewhat, to achieve a surface cracking. Using
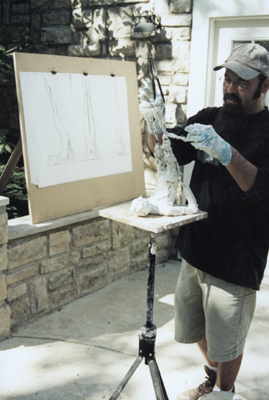
a variety of tools which include various rasps, dremel tool bits, sand paper
and sometimes even a grinder I then can begin the process of working at the
cement to smooth out, correct errors and make marks that would be indicative
to an original sculpture. (see photo 3) In this process if steel wool
has been added to the final layer, will become evident in parts of the sculpture
depending on the degree of sanding. I have found that this effect will take
away any preconceived ideas of what cement should look like, and when sanded
smooth will resemble veins as in marble. The moisture content should remain
high in the sculptures to keep the material from becoming so hard it becomes
difficult to work with. This means that when a sculpture is started, it needs
to be completed in a timely fashion, and wrapped in plastic when not being
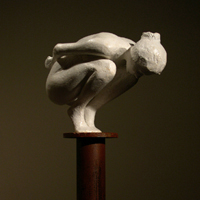
worked on. When the cement has time to slowly cure, and the sculpture is finished,
it is then sealed with a stone sealer. The final layer is a clear wax to help
buff the finish to a low luster sheen.